 fig. 2-
 fig. 3-
 fig.4-
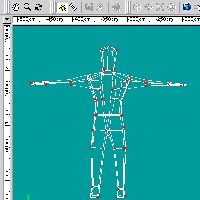
You do need working knowledge of AM. Adding bones and how to make an action file and what normals are.
And save Often.
We're going to see how I'm making my Cannibals for Cannibal Island.
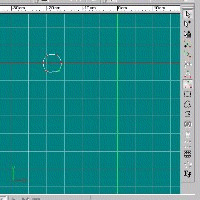
First open AM, then click new in Project then in the Project Workspace window right click Object then new then model. First I started by making a rough humonoid shaped figure by using Add Lock Key by making a rough circle using 6 points, fig.1 , selecting them all then extruding until I get a head and torso shape. Using the group mode feature select all the points you have so far, fig. 2, now in the Project Workspace window in your new model there is now a group file with unknown off it, click unknown then hit F2 and rename it Torso or whatever you want, fig. 3, now if you need to select these points now all you have to do is click on Torso and all your points will be selected. This helped me in skinning the model for qME. You can either extrude each half the model to make the legs except you'll have to connect the front and the rear with a line between the legs using Add Lock Key or start with a new circle and make seperate legs, if you make the legs seperate group them and then name the left leg, right leg. Then do the same for the arms. Here is a finished example. fig. 4. I also found that you should try to make the models face flat.
fig. 1-fig. 2-fig. 3-fig.4-
Now I cheated in shaping the body. Right clicking the model in the Project Workspace window then New, then Rotoscope, I used jeff off the AM cd. Hit browse, then go to the AM cd, click Data, Models, Actors, Jeff, Maps. In the Maps get each picture. Double click a rotoscope to get the image on your model. Then resize the image to get near the size of your model. In the properties for the rotoscope turn off pickable when you get it the size you need and choose front, back, top and bottom views that each rotoscope would be. fig. 5
fig. 5-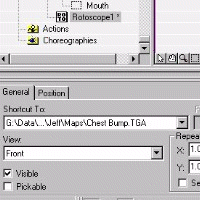
Here is an example of a charactor I made using Poser 3 then exporting the picture out of Poser 3 then shaping my humonoid form to it. fig. 6 and 7. You'll notice I made the body all one piece, where my cannible has seperate arms, hair and loincloth.
fig. 6-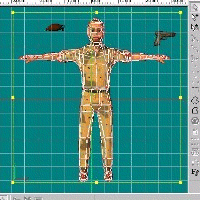 fig. 7-
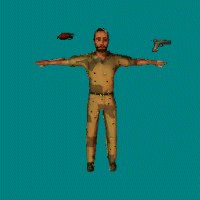
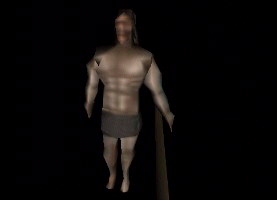
Here is this model in a game-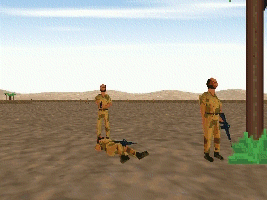
Now after shaping the model to match the arms and legs, body, I made hair and a staff weapon and grouped each so that I can move them around easily. Now right click model, then New, Decal. Now using your picture from rotoscope align it over your model, you may have to resize it, them right click it, then hit apply. fig. 8. After you applied all your decals you basically have a complete model. Now you need to get it ready for export to Qme. The skin you just did does not export with .dxf and .dxf is how you get your model to Qme. Fun.
fig. 8-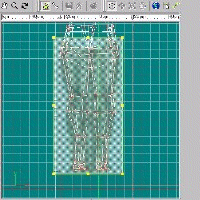
You need to animate your figure for walking, shooting, dying and just standing around. But your figure needs bones to animate and just read the manual on how to assign bones to your model. In mine, I skipped each individual finger bones and facial bones. To animate you need to make actions for each type of movement. The easiest is just standing there maybe tapping a foot or just looking around. The tutorial in the book on walking was easy and explained on how to to all animations. In Am '99 it's on page 372, and the thing to remember is to have frame 0 and the last frame to be identical so you get smooth movement as it repeats itself in your game.
In Project Workspace right click Action then New. A new window will open with your model and the bones visable. I flattened out my model then took a back and front final picture to use as my skin for the skin mapping frame that I'm going to use to start out every .md2 for use in Qme and eventually in my game. You can only flatten a model in an Action.
fig. 9- 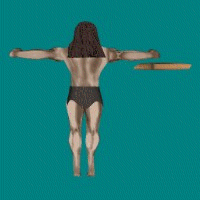 fig. 10-
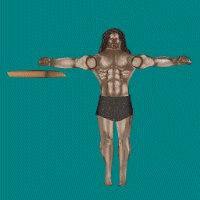
To flatten click Muscle Mode then click on 1 point in your model then hit "/" forward slash to group all the connected points, then hit Rotate Mode. Now your model is selected you need to change to birds eye view and select the red box that's above the center point. fig 11. and then pull down 90 degrees so its facing back. Now in a side view grab the center point and drag behind the model. fig. 12 Now right click near the center point and hit Flatten. After I flattened each item in my model, you'll notice each piece is seperate, the arms, hair, loin cloth and weapon. fig. 13. Using Render Mode I took a front and back picture.I rendered them at 300x300 to keep the detail in. fig. 14. to aid in skinning later. Make a new action for walk, then one for running , then one for dying, guarding,etc. After you are done with each individual action you need to open a new Choreography then right click and hold your model in the Object and drag it into your Choreography. Then grab each action and drag them into your model in your Choreography in the order you want but make the flatten action first and make it only 1 frame, 0. Give it a length of one. Then go through the properties panel for each action and make sure the frames number from one action to the next. You are now ready to export to Qme. Right click Choreography and then Export as Model, give it a saved name click OK, then in export options I picked 1 Polygons Per Patch, Then the frames 0 to whatever your last frame would be.
fig. 11- fig. 12-
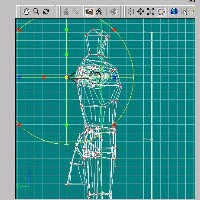 fig. 13-
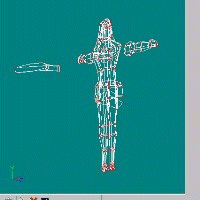 fig. 14-
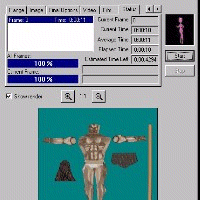
Now we move to Qme. Open Qme. Under File Open model and choose the first model only. fig. 15. Right clicking your mouse and moving it in a window will rotate your flat model, and Left click will move it around. If there are any invisable places in your model then you have some normals facing inwards on your model and will have to flip them in AM so that they are facing outwards. Again the manual will be your best bet on how to do this. Click the skin editor then color editor, pick a color then bucket fill your skin. I then get a dark color and outline my figure for skinning** in Photostudio using my pictures I took earlier of the flat front and back. fig. 16. To export skin right click new skin in the left window then chose export skin and save it. Now open your skin and the front and back flat picture you took in AM.20, fig. 9 and 10,into your paint editor that you use. Take these pictures and put them into the skin you exported from Qme and fit them into the traced outline you did. The front view is on the right. fig. 17 and 18
fig. 15- fig. 16-
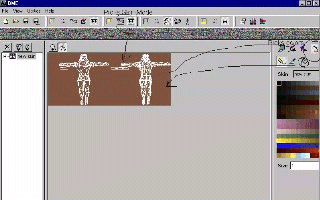 ** below the color palate
to the right of the pencil size is a button that will put the verrtices on your skin for you. No tracing. Make sure you picked a color different from the skins color
fig. 17-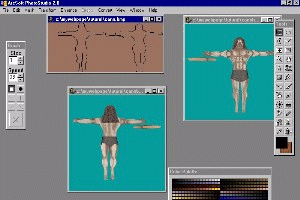 fig. 18-
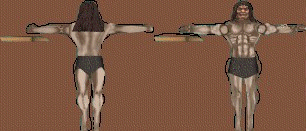
Resave the skin. Then in Qme right click new skin like you did when you exported the skin but instead import the skin, replace the old skin. Switch back to model mode and you can see what your model looks like skinned. Now add the rest of you frames. Click File then import frames, now click your second frame then while holding the shift key down click your last frame then hit OK. The first frame is your skinning frame if you click it also, your first frame in your movement will be the flat model. fig. 19. In Qme switch back to model view, by hitting the camcorder icon. fig 20. In the left window will be your animations name and skin, If you open the animation you can check your model frame by frame, now is the time to fine tune your skin, then export it to save it, after you're done with your skin use the Edit Model properties to change the skins size to 64x64 or 128x128 or even 256x256 into flcl.lib directory in the Gcsarp. Then In File save your model as an .Md2 then put it into your model directory that is in your gaurd directory along with the .mdi file you'll need.
fig. 19-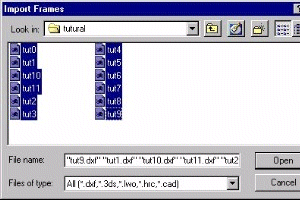 fig. 20-
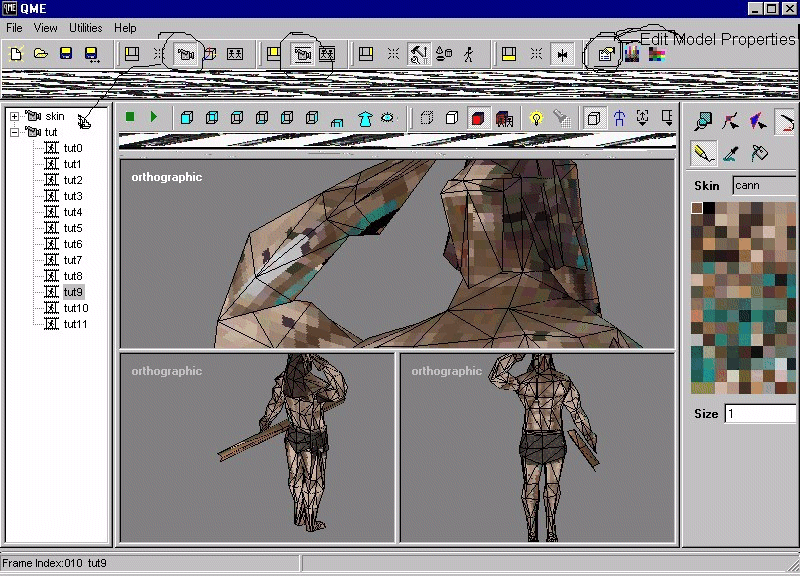
That was a rough overview of what it takes to make an .md2 from scratch. My skin in this tutoral was 128x128, and I think from these pictures that 256x256 is going to be the best bet for good detail on an enemy model. You see I need to get in and touch up the skin to give it a more realistic look, but that is something I'm still practicing up on.
Here is a finished view of the newest version (Sept. 2001) of the cannibal in the game with the skin at 512x256-

If there is anything I did that could be done easier let me know. games@3dgames.nu
me any comments.
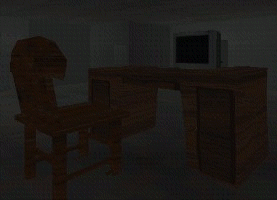
Here are some md2 models that is possible, a desk, chair and monitor.
 This Pie3d GCS site is
owned by
This Pie3d GCS site is
owned by Danny Olsson. Want to join the Pie3D GCS Webring? |
|---|
| [Skip Prev] [Prev] [Next] [Skip Next] [Random] [Next 5] [List Sites] |